

How to send form data from the backend-to the database (MongoDB)
In this tutorial we will use the data of the previous tutorial: Send form data to the backend (Node JS).
If you did not read this tutorial you can check it here : Send form data to a server Also, we will use MongoDB as database to store data. To know more about MongoDB and how to set it up and get the link to establish a connection check this tutorial: Send data to MongoDB So, to store form data in the database, let’s follow the below steps:
1)- Step 1: Create a template
First, let’s create a template of our data.
A template is simply a model to tell MongoDB that the data should be stored in a certain way.
To create a template or a model for our data we will use mongoose.
mongoose is an Object Data Modeling library for MongoDB and Node JS. It is this library that manages relationships between data.
So to install it all you have to do is to go to Node JS terminal and type: npm install mongoose.
 Once installed create a template.js file.
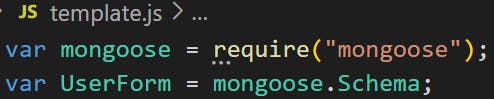
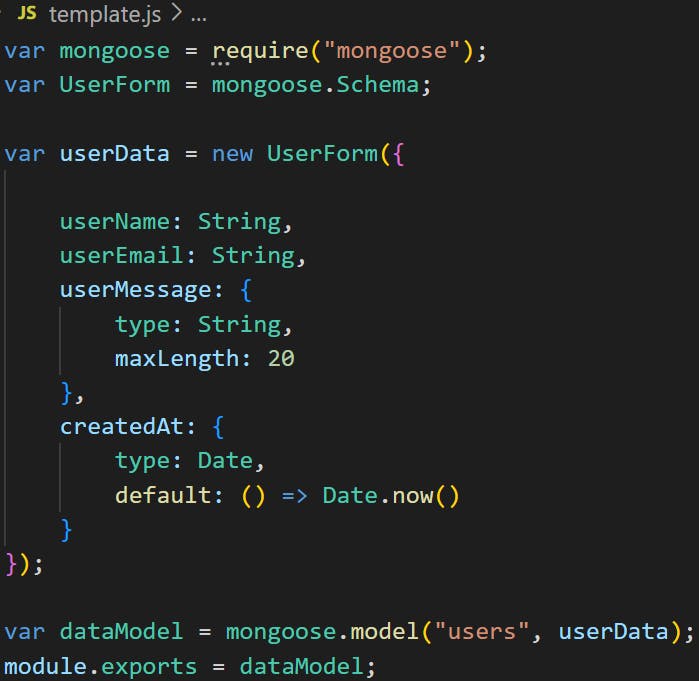
Inside this template.js file we will import the mongoose package by requiring it. So the code will be:
 mongoose works with a Schema constructor. It is this Schema constructor that allows us to set a template for our data.
To access the Schema constructor we’ll use the following code:
 So now we will create an instance of this constructor and set our template:
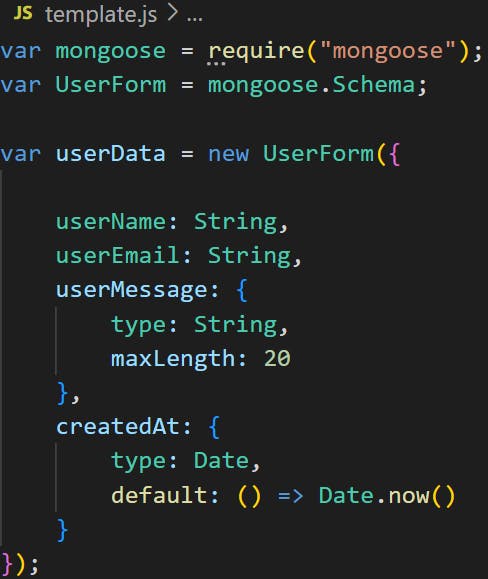 Here we told mongoose that we want the data to be stored with the variable userName holding the name of the user, the variable userEmail holding the email of the user, the variable userMessage holding the message of the user and then variable createdAt that will save the date when the data is added to the database.
Also we added some validations like for the message, it should not exceed 20 characters, so we set the maxLength to 20. And for the date, we want the date to be the date of today, hence the default property set to Date.now().
For the variables name userName, userEmail and userMessage they should be the same as the attribute name in the From:
 Now that we set our template, all what is left is to tell mongoose to generate a model from the created template.
To do that we’ll add the code:
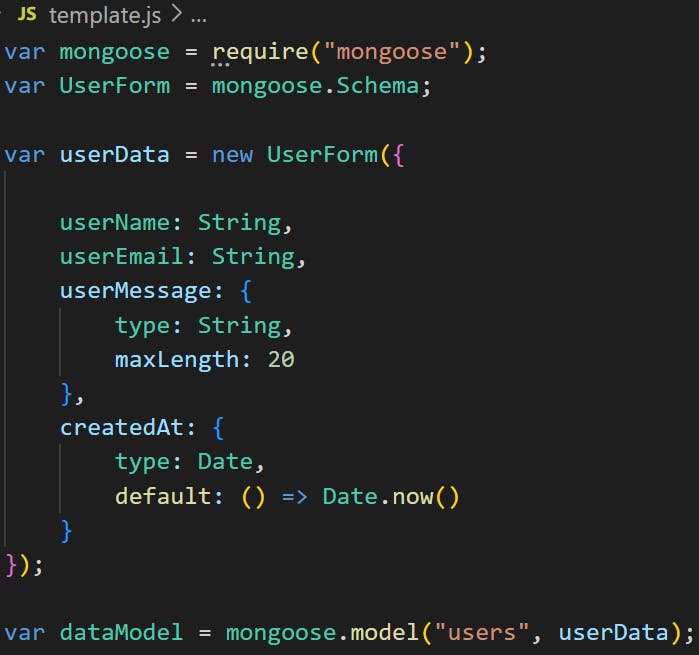 mongoose.model() syntax allows us to create a model, and takes 2 parameters. The first parameter is the name of the collection where we want our data to be stored, and the second parameter is the template that we set and that mongoose will use to create the model from.
Finally, we have to import the dataModel so that we can use it outside the template.js file.
2)- Step 2: Store data in MongoDB
After setting a templating for our data, now it is time to send to the database and store it there.
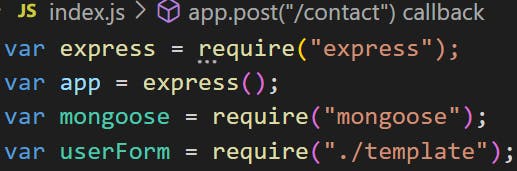
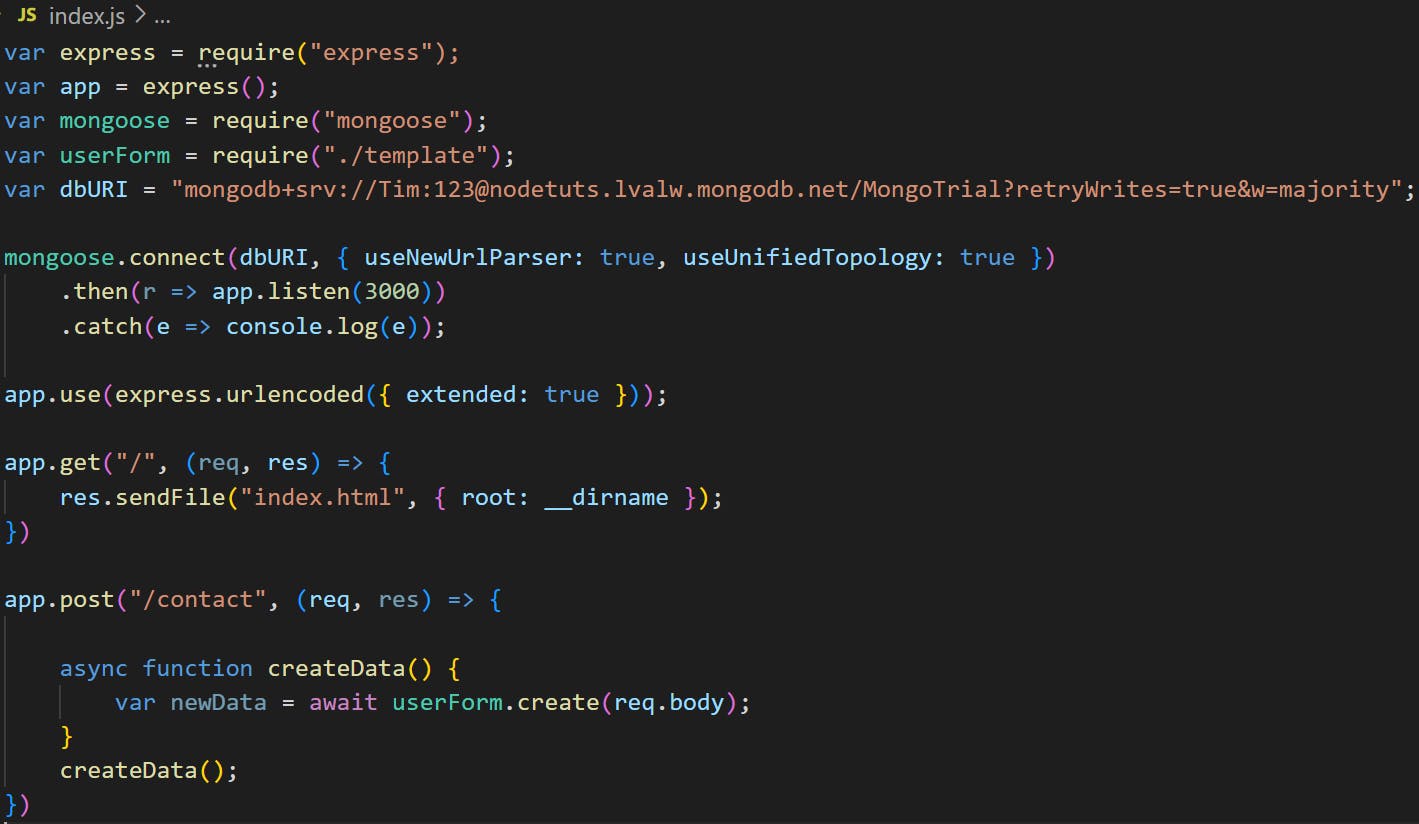
To do that we will go back to the index.js file.
we will require mongoose again as it will help us establish a connection to MongoDB.
We will also require the template.js module.
So the code will be:
 And then we will connect to the database.
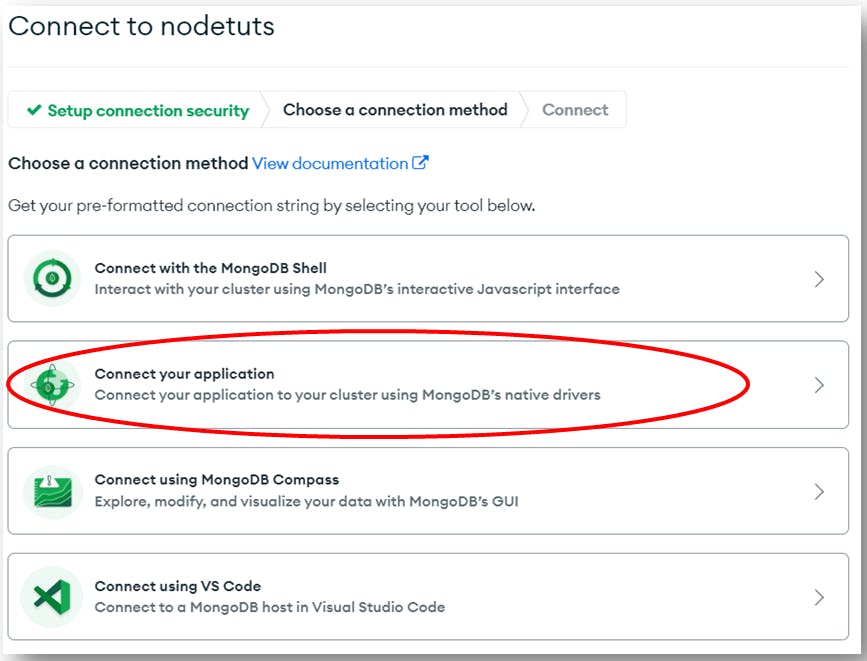
To do that go to MongoDB, and click on the connect button below:
 Click on the “connect your application”:
 Copy the link that you will have :
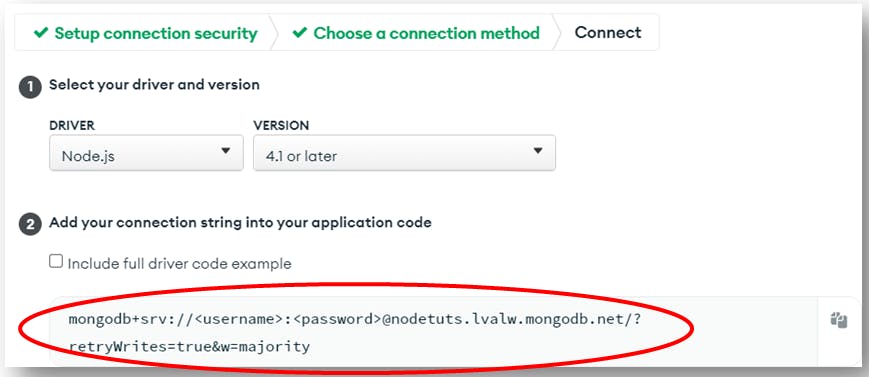 And then store this link in a variable that we’ll call dbURI:
 Here in the link change the
 <username> tag, add the name of someone who has the rights to access the database instead. In this example it is Tim.
And also in the <password> tag, add the password of someone who has the rights to access the database, in this example it is Tim’s password which is 123.
For more information on how to connect to MongoDB check my tutorial : Send front-end data from the server to MongoDB Now let’s connect to MongoDB. For that we’ll use mongoose and the code will be:
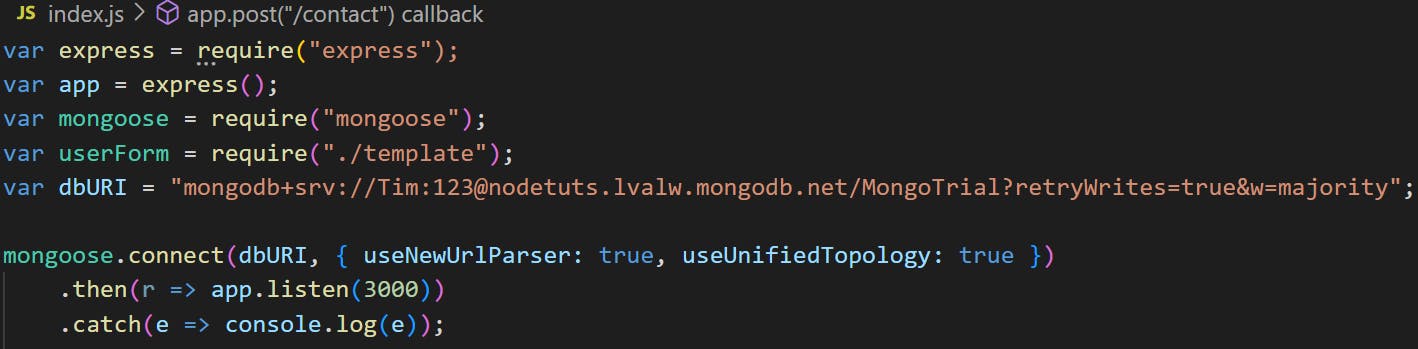 mongoose.connect() syntax is an asynchronous syntax, that’s why we have then() and catch() methods.
mongoose.connect() takes the URL we stored in dbURI variable to connect to as a parameter, and an object that should be added to avoid any Node JS deprecation or error messages.
So now in the app.post() method instead of just displaying the received data in Node JS terminal as we did in the previous tutorial: Send form data to a server To do that we will add an asyncronous function where we will create a new variable:
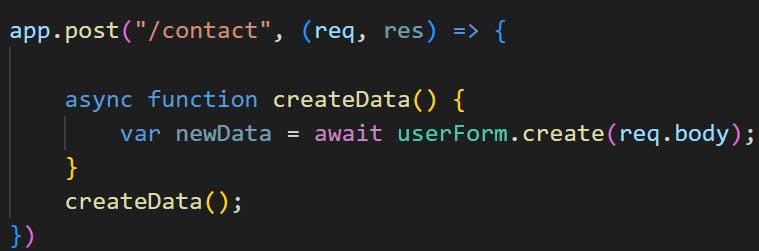 Inside this variable which is newData we stored the userForm.create(req.body) value.
userForm.create() is here to create the the data received in MongoDB.
The body is the body that the form sends when clicked on the submit button. This body contains the data we want to store, and to access it in the backend we use the req.body syntax.
So the final code becomes:
 Now if we go to the browser and add some information in the form:
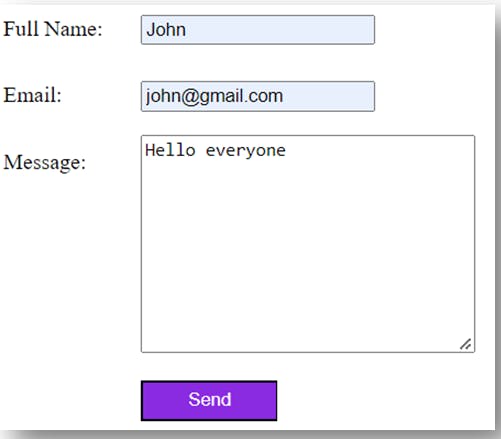 And click the send button, in Node JS terminal we will run the server, and go to MongoDB and refresh the page and we’ll have:
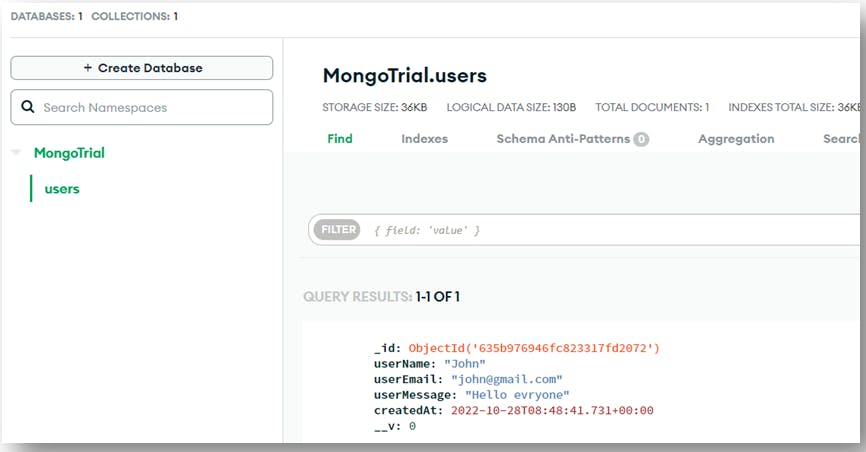 So now the data is stored in the “users” collection we created in template.js file.
To get access to the entire code check my tutorial: Store form data in a database
So now the data is stored in the “users” collection we created in template.js file.
To get access to the entire code check my tutorial: Store form data in a database