Send Data from backend (Node JS) to a database (MongoDB) and store it

How to send data from back-end to database?
To send data received by the back-end to a database and store it there we'll use mongoose.
mongoose is a Node JS library for MongoDB database.
In this tutorial we'll use MongoDB as database.
To know how we send data from the front-end to the back-end check my tutorial: https://purpose-code.com/fetch-api-send-data-from-front-end-to-back-end/
1)- What is MongoDB?
MongoDB is a document-oriented NoSQL database used for high volume data storage. The difference between MongoDB and the traditional database like SQL is that MongoDB stores data in collections, while the traditional database store data in tables (rows and columns).
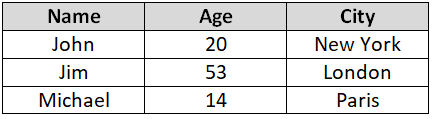 Traditional storage
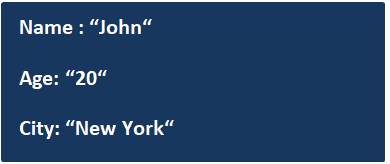 MongoDB storage
2)- How to send data from Node JS to MongoDB?
Let's work with the data we had from the previous tutorial that you can check here: https://purpose-code.com/fetch-api-send-data-from-front-end-to-back-end/
Le'ts store this data in mongoDB.
First let's install a library in Node JS called mongoose. mongoose will help us set a template of the data to tell MongoDB this is how we want our data to be stored.
To install mongoose just go to Node JS terminal and type npm install mongoose.
 Now that mongoose is installed, let's create a new .js file.
1)-Step 1: Create a new .js file
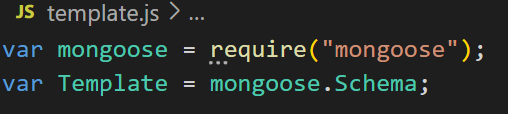
Let's create a new .js file and give it a name of template.js.
Inside this file we'll import our mongoose library or module. To do that we'll use the require() syntax.
So the code will be:
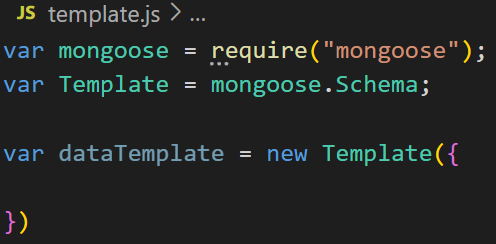
 After requiring mongoose module, we'll access mongoose Schema property. The mongoose Schema property is a constructor. This constructor is what will allow us to set a template for our data.
To access mongoose Schema we'll add the following code:
 The Template variable name starts with uppercase T because as we said, Schema is a constructor, and constructor's names always start with uppercase.
Now it is time to create the template. To do that we'll call the Template constructor that will help us create a new instance.
 So inside this dataTemplate variable we'll add the template of our data to tell mongoose we want MongoDB to receive for example the name, the age and the city of each user, or we want MongoDB to receive the name, the email and the address of each user and so on... Depending on what we want to store.
So here we want to store the name, the email and the city of the users. So the template will be:
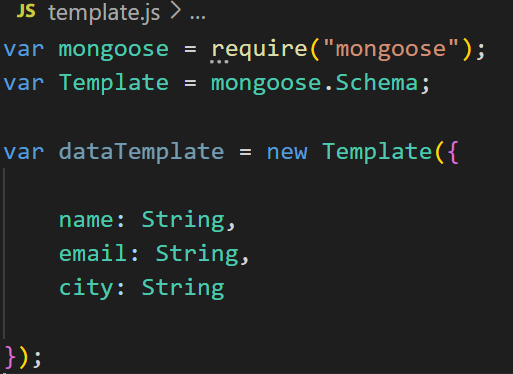 So here we told mongoose that we want to store the name, the email and the city. And also we specified the type of these variables. All the variables are String.
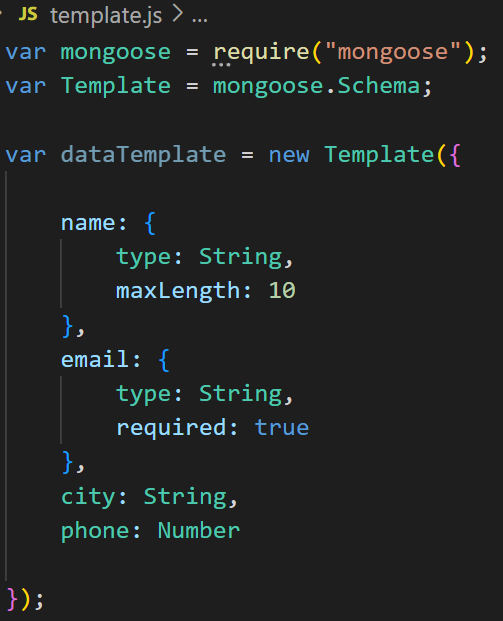
If we wanted to store the phone number as well, and add some condition on the email to make it compulsory for the user to provide it, and the name to be less than 10 characters long, we would have set the template like this:
 But now let's keep it simple and store only the name, city and the email of the users.
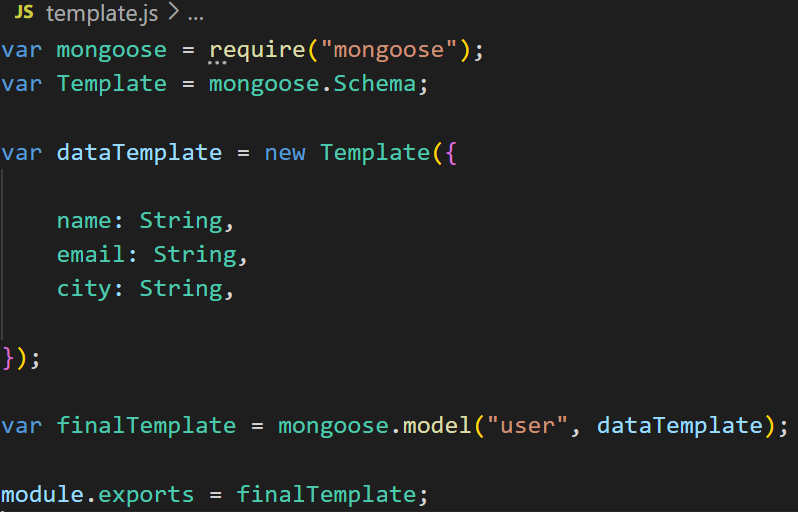
Now we will tell mongoose we're finished, all you have to do is to create the model from the template we just created, and store it in a certain database:
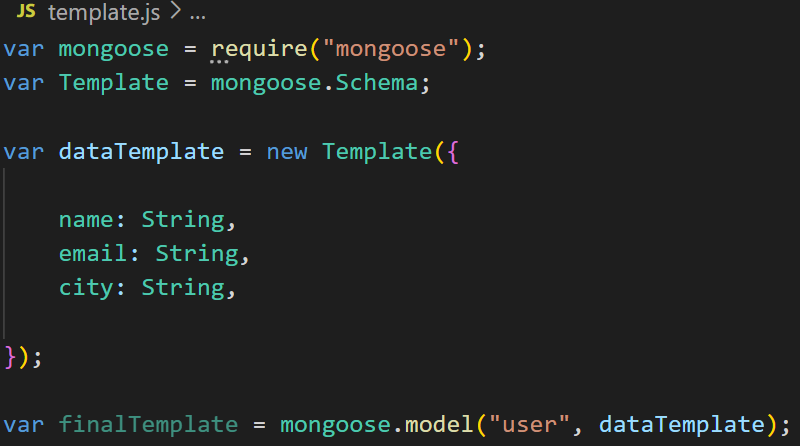 mongoose.model() syntax is what tells mongoose to create a model. It takes 2 arguments: The name of the database and the template we created. Which means mongoose should create a model and store it in a database named "user", and the model should be created from the dataTemplate variable.
Just for information, when storing data in MongoDB, if MongoDB does not find the database that has a name of "user" then it will create one automatically.
Also, here we gave the database a name of "user", but when storing data MongoDB will add an "s" at the end of the "user", which will make it "users". This is how MongoDB works.
So now that we told mongoose to create a model, it is time to export the variable finalTemplate so that we can work with it and use it outside the template.js module.
2)- Step 2: Connect to the database
Now let's connect to the database.
First, go to MongoDB and create a free account here: https://www.mongodb.com/cloud/atlas/register
Once the account created the following page will appear:
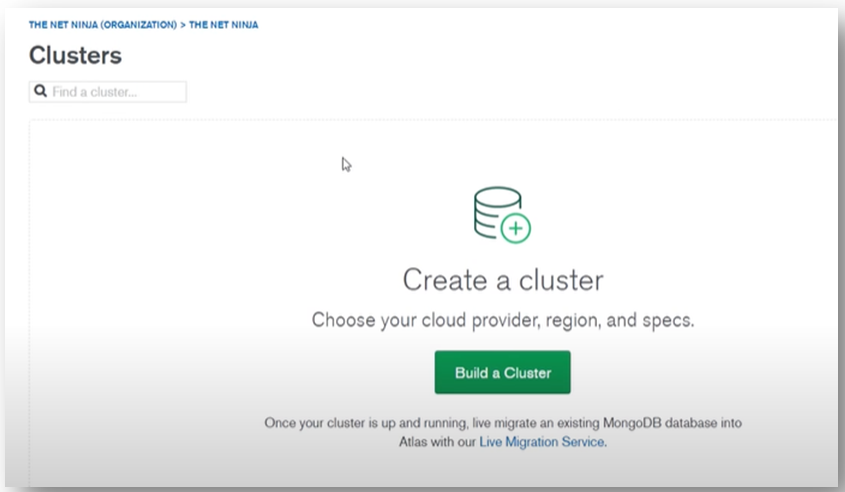 You should create a "cluster" by clicking on the button "Build a cluster".
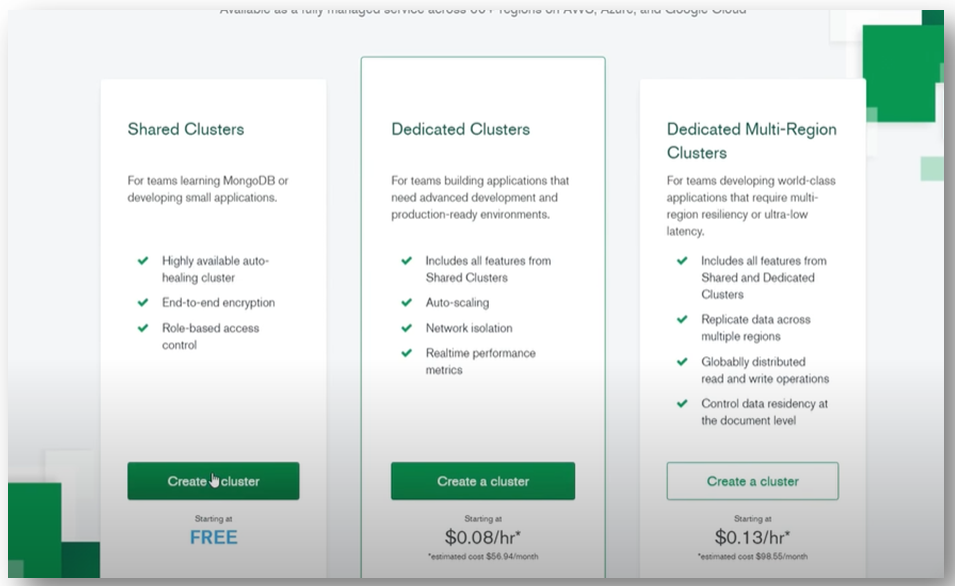
Once clicked on the button you'll have to choose one of the 3 plans. In this tutorial we'll go with the "Free" plan.
 Now after choosing the Free plan you'll have the following page:
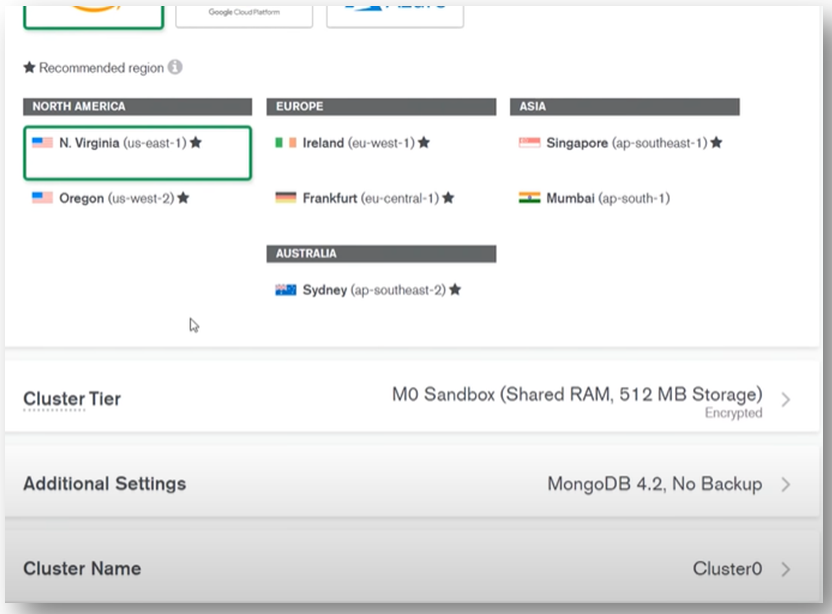 Down in the above picture there is "Cluster name" section, click there and give the cluster a name of "nodetuts". You can give it any name you want but in this tutorial we will work with "nodetuts".
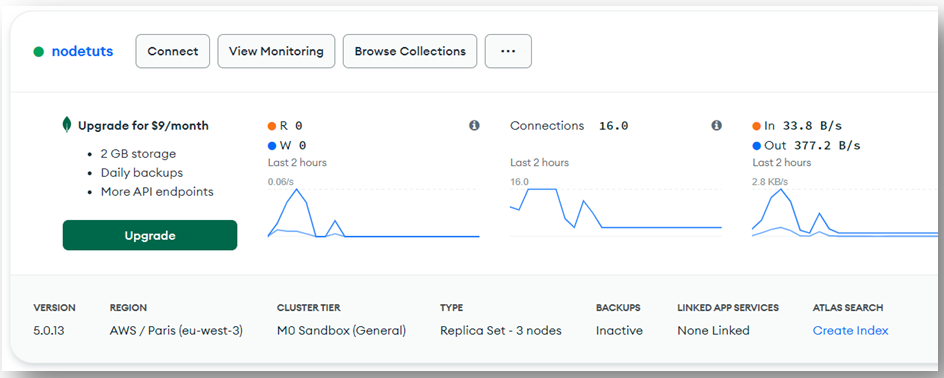
Now after creating the cluster you'll have the following page:
 Now that we have a cluster we will create a user password, so that when connecting to the database, only the the person who has the password can connect to it.
For that go the menu bar on the left and click on "Database access":
 Once clicked the following page appears. Click on the "Add new Database user" button on the right:
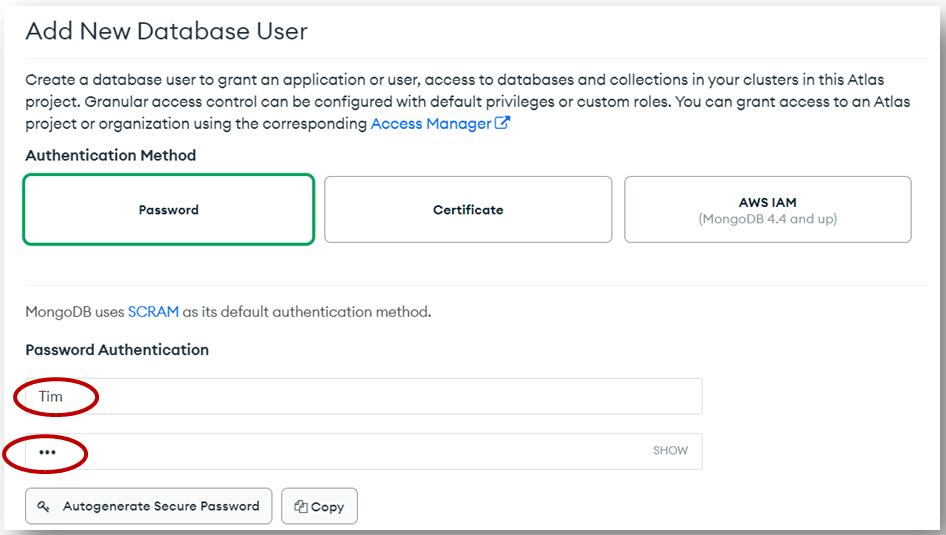
 Now you can add the user who can access the database. In this case I will add Tim and give him a password of 123.
 To specify and allocate a role to Tim scroll down in the same page to "Built-in Role":
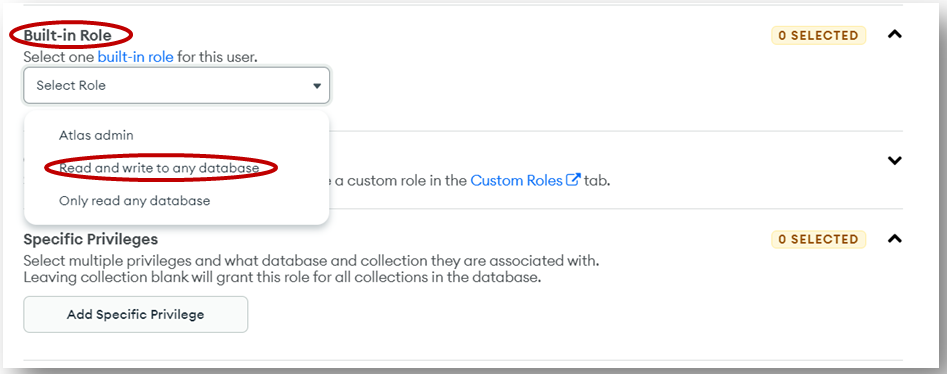 Then choose one of the roles available. For this tutorial I will give Tim a role of "Read and write any database". Which means admin.
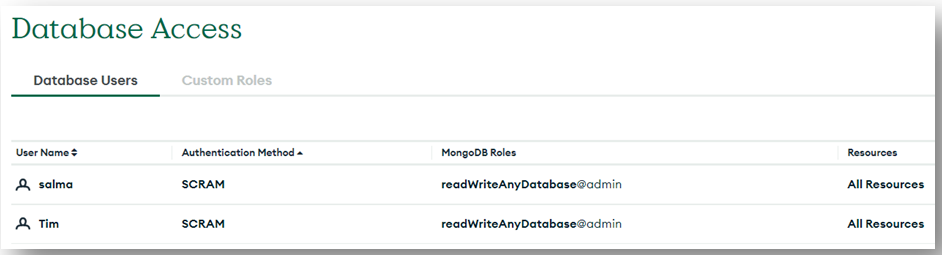
Then once finished click on the "Add user" button at the the end and you'll have the following screen:
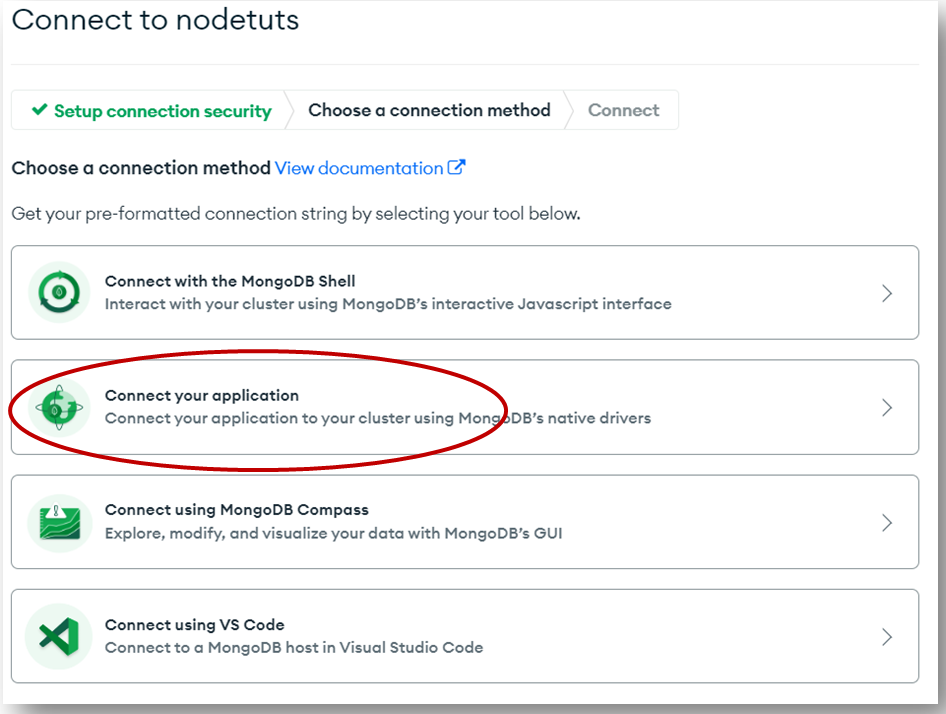
 Now let's go back to the dashboard and click on the "connect" button. To go back to the dashboard just click on "database" on the menu on the left:
 Once clicked on "connect" button you'll have this page:
To read the full tutorial visit my blog: Send data from the backend (Node JS) to a database (MongoDB)


