

1)- What is an array?
An array is a variable in JavaScript used to store data. Arrays are used when we have a large list of data and we want to store it to access it one by one.
For more information about arrays, how to create them in JavaScript and how to add, remove elements and join multiple arrays please check the following tutorial: Javascript arrays.
2)- How to loop through an array?
1)- For loop
To loop through an array the 1st common method is to use the for loop method.
The for loop method will run through the elements of the array, but it does not look for the element itself, but for its index/position in the array.
Let's take an example to see how for loop works exactly.
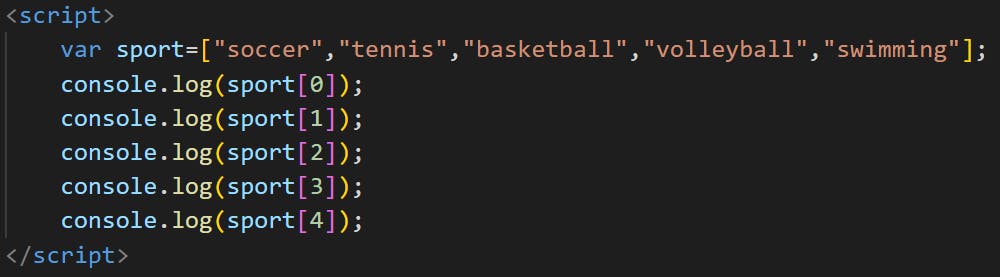
Let's say we have a table of strings:
 Our array contains 5 elements.
Now if we want to display each element of the array in the console we can do like this:
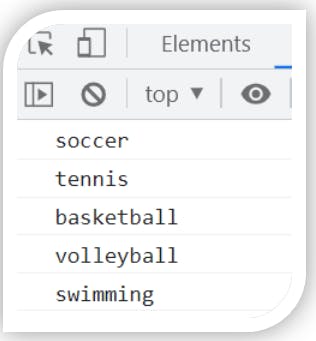
 So in the console we'll have:
 However, this is not a good method, especially if the array contains 100 hundred elements or more. If we were to add a hundred lines of console.log() syntax to display all the array elements, I would let you imagine how the code will be...
So to avoid this problem, and the best practice is to use the for loop method. The for loop method takes 3 arguments as we see from the code below:
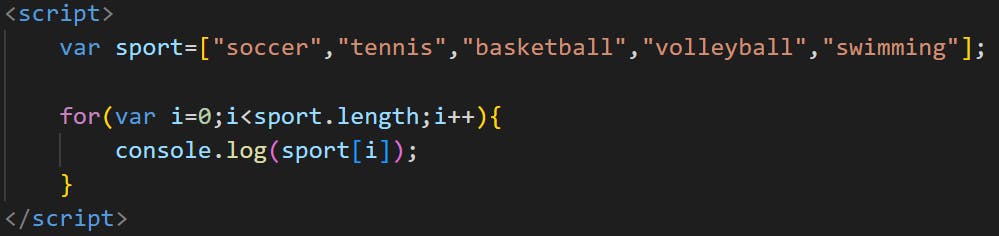 the first argument of the for loop is var i= 0, the value of the i variable tells the browser from where the loop should start. Here we gave the i variable a value of 0, which means that the for loop should start from 0. But which 0? In the for loop we always talk about the element index in the array.
In this array, "soccer" is the 1st element, but its index is 0. For "tennis", it is the 2nd element in the array, but its index is 1. For "basketball", it is the 3rd element of the array, but its index is 2. And that is because arrays start the count from 0 and not from 1. So if our array contains 5 elements, the index numbers go till 4.
In short, the index of an element = the spot of the element in the array- 1.
If we want the for loop to start from the second element "tennis" that has an index of 1, we should set the variable i to1.
So the for loop works with element indexes, instead of there spot number.
So now we want the for loop to start from the very beginning of the array, which means from index 0.
the variable i will go then through each index of the array. If we had 400 hundred indexes, the variable i will go through all of them one by one. But here we have only 4 indexes.
As we gave some directions to the for loop and told it from where to start looping, we should also tell it where to stop.
Here comes the role of the second parameter which is i<sport.length.
The length of an array is the number of elements that it contains. Here the array has 5 elements, so its length is 5.
We could have written i<5 and that is totally fine, because here we know the length of the array. But if we don't want to rack our brain or if we don't know the length of our array and we still want to tell the for loop to stop once it achieves the length of the array, all we have to do is to add the name of the array (here the name is sport), add a dot and then the keyword length.
Now that we have specified a starting point and an ending point, it's time to tell the for loop what should happen in between these 2 points.
Well, between these 2 points, the start and finish, we want the for loop to start and to continue counting indexes (0,1,2,3...) until it arrives to index4. So to continue counting the for loop understands that by adding the third argument which is i++.
This simply means telling the for loop well you start at index 0 which means var i=0 at the beginning, then add 1 and make it i=1, then add 1 and make it i=2, and then add 1 and make i=3.... And keep adding 1 until you reach i=4 and then stop.
So now let's see the results on the console:
 As you can see there is no difference in the results between for loop and what we did previously with the console.log() syntax except that with for loop it is a much cleaner code.
So how did this work? Simply the for loop took the value i=0 and looked for the element that has the index 0 in the array and displayed it, and then once finished the value of i becomes 1, so it looked one more time for the element that has index 1 in the array, and displayed it, and then once finished the value of i becomes 2, so it looked again for the element that has index 2 in the array and displayed it and so on... until it reached i=4, once it is displayed the element that has index 4 the for loop stopped.
2)- For...of...
Another way to loop through an array is the for...of... loop.
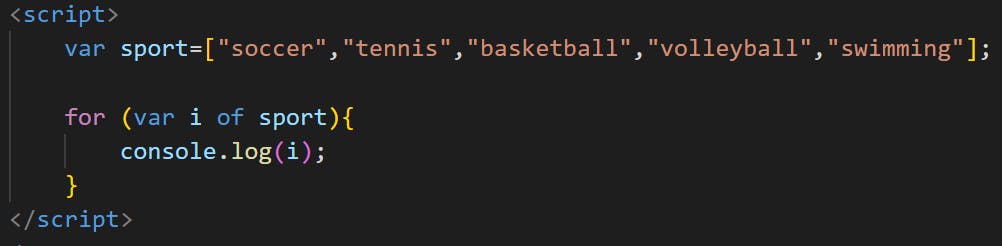
To do that we'll use the following code:
 Now what is the difference between the classic for loop and the for...of... loop?
As we said before, the classic for loop looks for the index of the element, and uses the index of this element to display it, but the for...of... loop looks for the element itself, it looks for the spot of the element in the array.
In other words, the for...of... loop behaves like us human beings, because for us when we see "soccer" we say that soccer is the first element of the array, same thing for the for...of... loop, it behaves in the same way.
so here the i variable does not need any initialization. We don't need to set the i variable to 0 or 1 or 2 or 3 because in the for...of... loop the i variable is equal to the whole element, instead of an index. So when we say for (var i of sport), i will be equal to all the elements of the array.
So the i variable will take a value of "soccer" and then will take a value of "tennis" and then a value of "basketball"...
The results on the console will be the same:

3)- ForEach loop
A third method to use to loop through an array is the forEach() method.
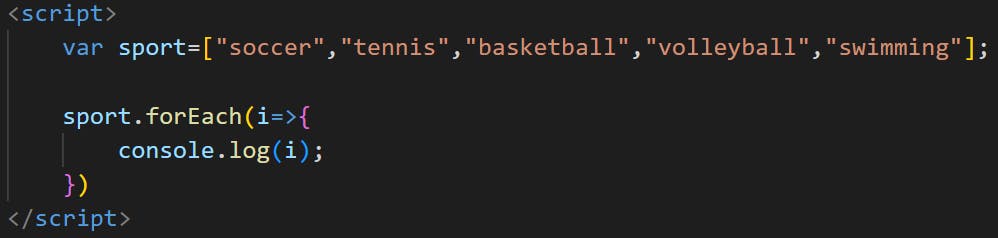 The forEach() method is very useful when we want to work with functions. We use forEach() loop most of the time when we want to include the elements of the array directly inside a function.
Here in the forEach() loop, the variable i will go through each element of the array. The variable i does not need any initialization.
So the results again will be the same:
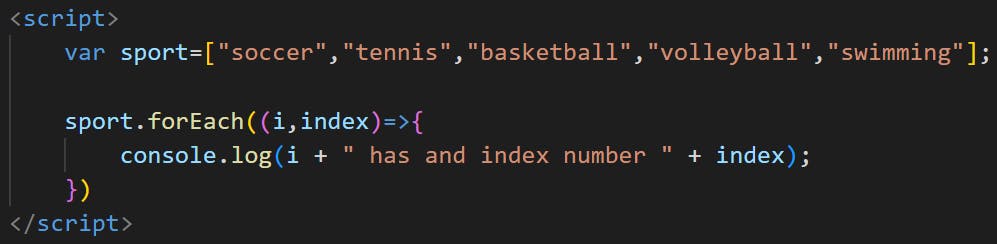
 On the top of the i variable, we can add another parameter to the forEach() loop and which is index. Indeed, the forEach() loop understands also the index of an array, just like the classic for loop.
So the code will be:
 So when displaying this code in the console we have:
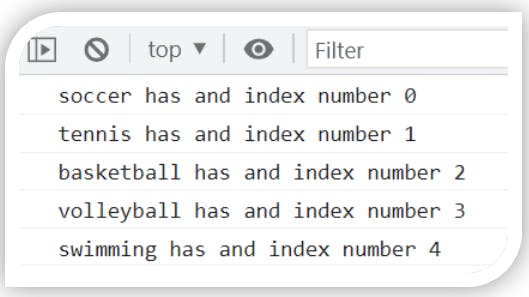 So the i parameter allows the forEach() loop to work like the for...of... loop, where i goes through the elements of the array and not their indexes. But the index parameter allows the forEach() to work like the classic for loop that recognizes indexes.
3)- Conclusion
There are 3 methods to loop through an array in JavaScript and in this tutorial we discovered each one of them and went through some examples.
Looping through an array is a very important concept in JavaScript that make managing and checking the data easier.
Hope you find this article useful. For more articles like this on HTML, CSS and javascript visit my blog. For more information on what is an array and how we add and remove elements and join arrays visit this article