How to make tables in HTML and handle them

How to make a table in HTML?
To make a table in HTML we use the tag <table></table>.
A table is made of rows, and in HTML we call them table rows. To add table rows we use the tag
<tr></tr>.
Each table row will contain some data. This data is added inside cells, that we call table data, and that we add using the tag <td></td>.
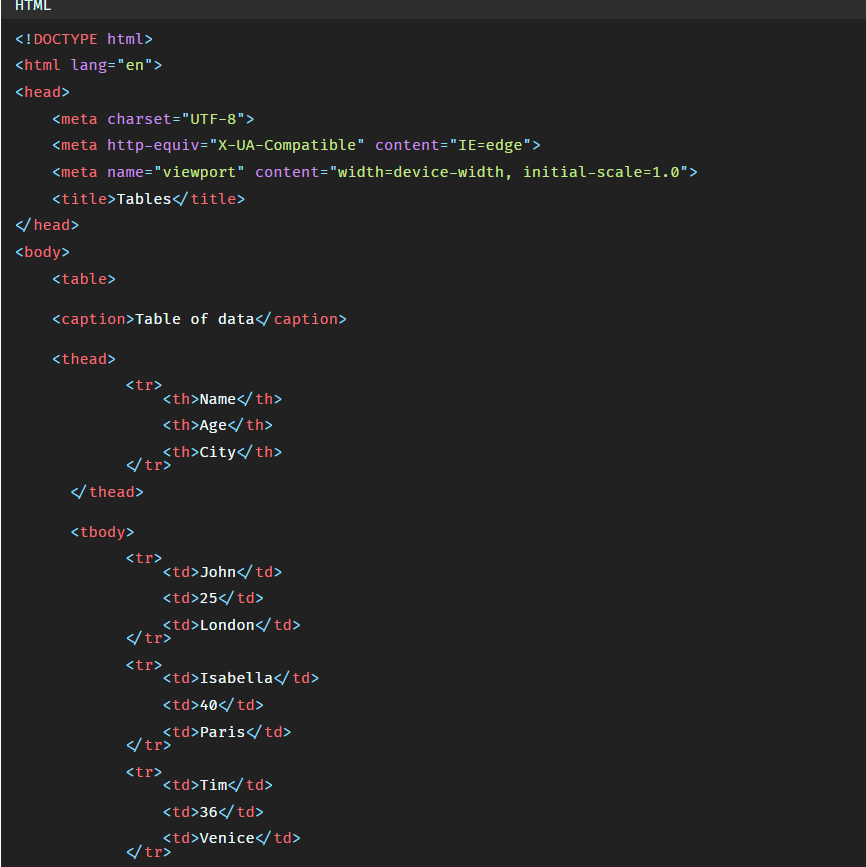
Let's create a table to see how it works.
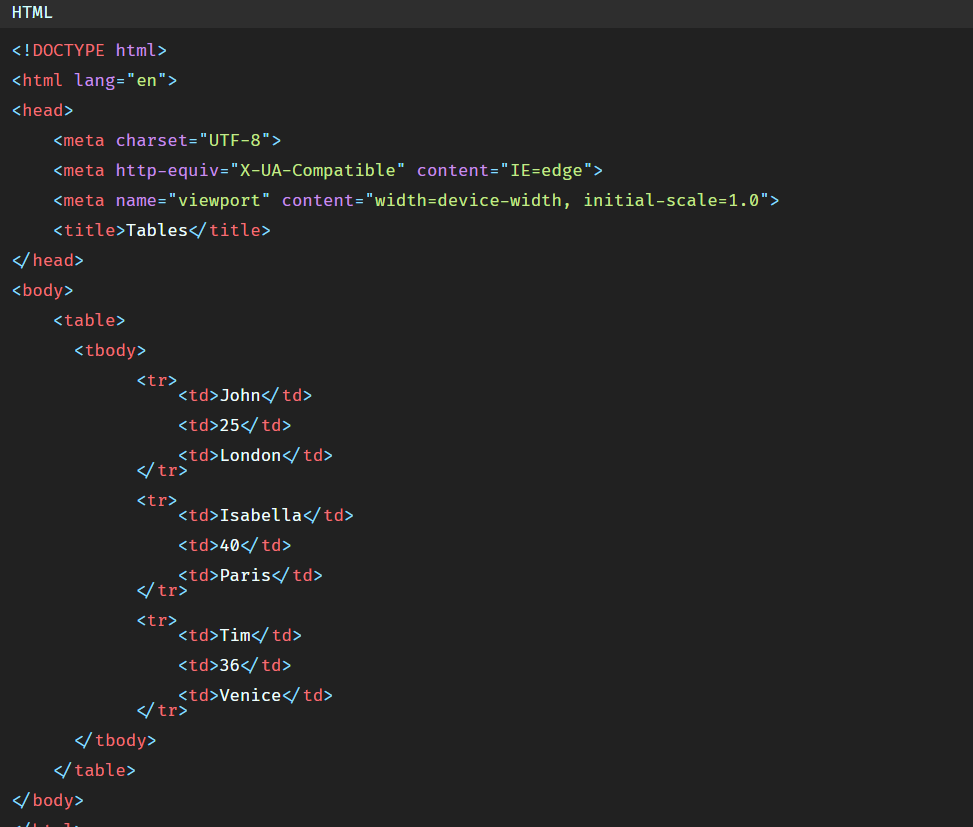
We will add a table with people's name, age and city. So the code will be:
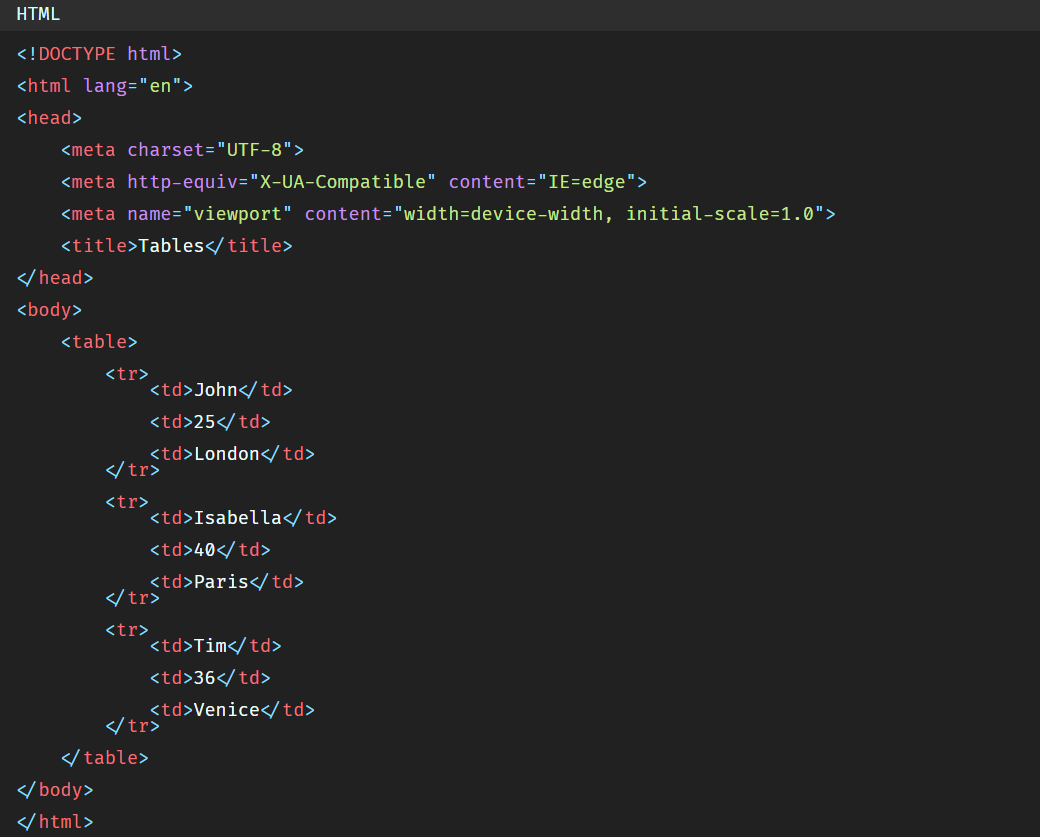
In the browser we have:
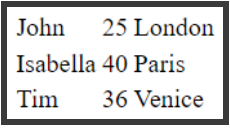
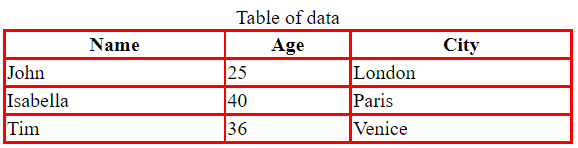
Here is our HTML table. We added the <tr></tr> tags inside the <table></table> tag, and the <td></td> tags inside the <tr></tr> tags. And each <td></td> tag represents a data that will be added to the same row of the table.
But our table does not look attractive as there is no style added and no borders between the rows and columns.
Let's add some borders before we move forward.
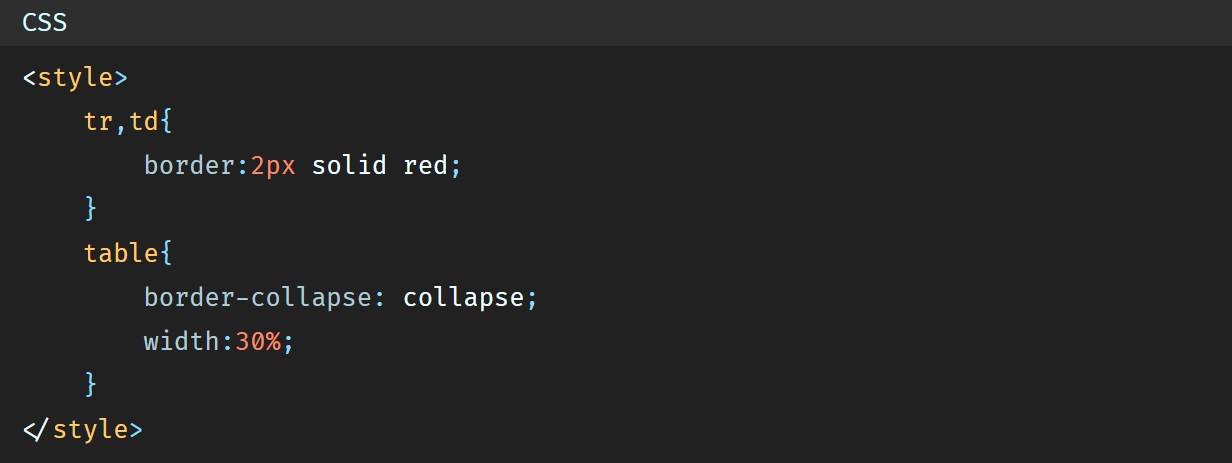
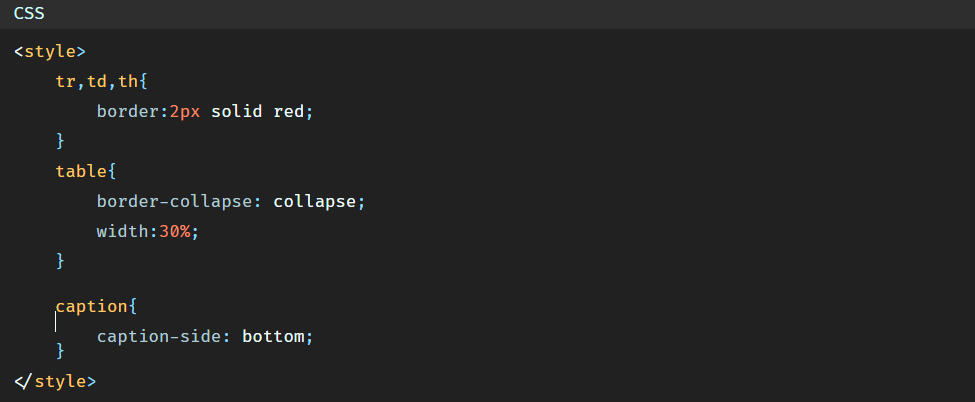
So the CSS code will be:
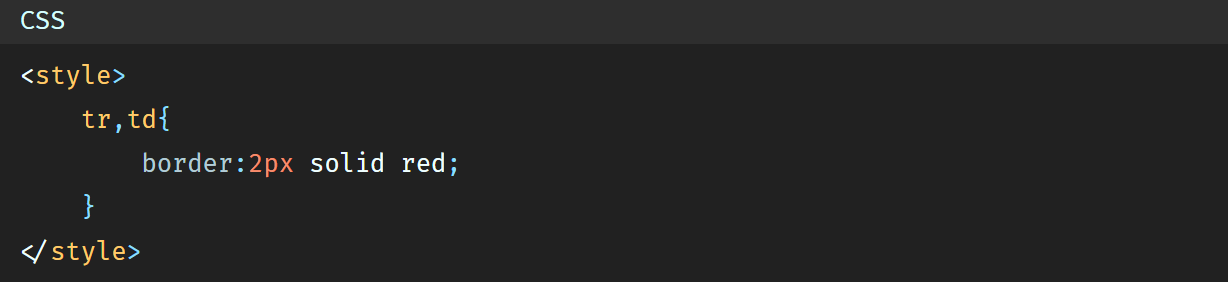 To add borders between the rows and the columns we selected the tr and td tags and added the border property.
If you want to go in depth and know how to add borders in CSS check my tutorial: How to add borders to HTML elements
So in the browser we have:
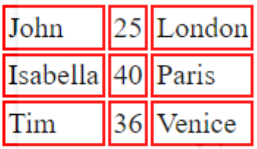 Now we have the borders added to our table, but still the borders do not form one line between the rows and the columns, it is like if every cell of the table has its own borders.
So how to join these borders together to form one line?
Well, for that we'll use the border-collapse CSS property and we'll give it collapse as a value. We'll also give the table a width of 30% to make it a little bit bigger.
The CSS code becomes:
 And the table becomes:
 Now we have our table.
HTML table is made of 3 parts: The headers of the table, the body of the table and the footer of the table.
In this example we don't have the headers nor the footer because we did not add them, however we have the body, and the body is all the data that makes and build the table and that is not considered as table headers or footer.
To specify to the browser that this part of the table is actually the body of the table, we wrap all the data inside a <tbody></tbody> tag.
So the HTML code becomes:
 This will not have any effect on the final results on the browser, so if you refresh you will not see anything.
 <tbody></tbody> tag is here just to specify that this part of the table is the table's body.
Now if we want to add table headers, how can we do that?
a)- Table headers
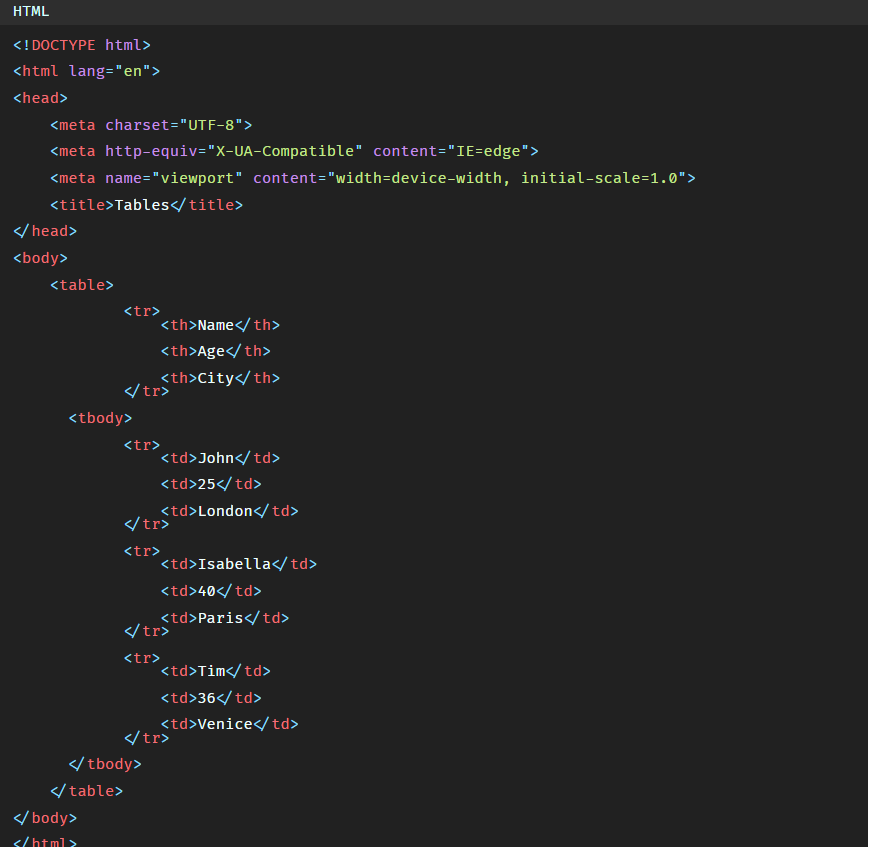
Here in our example we have a table that contains people's name, age and city. But it is not clear for the user what the data is about unless if we add a sort of label to the table's columns to say that this column contains people's name, and this column contains people's age,and this column contains people's city. So these labels that we'll add are called table headers.
And to add them we'll use the tag <th></th> this time instead of <td></td>.
The HTML code will be:
 And to add borders the CSS code will be:

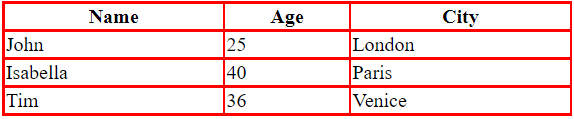
So in the browser we have:
 The
The <th></th> tag adds the table headers and make them automatically bold.
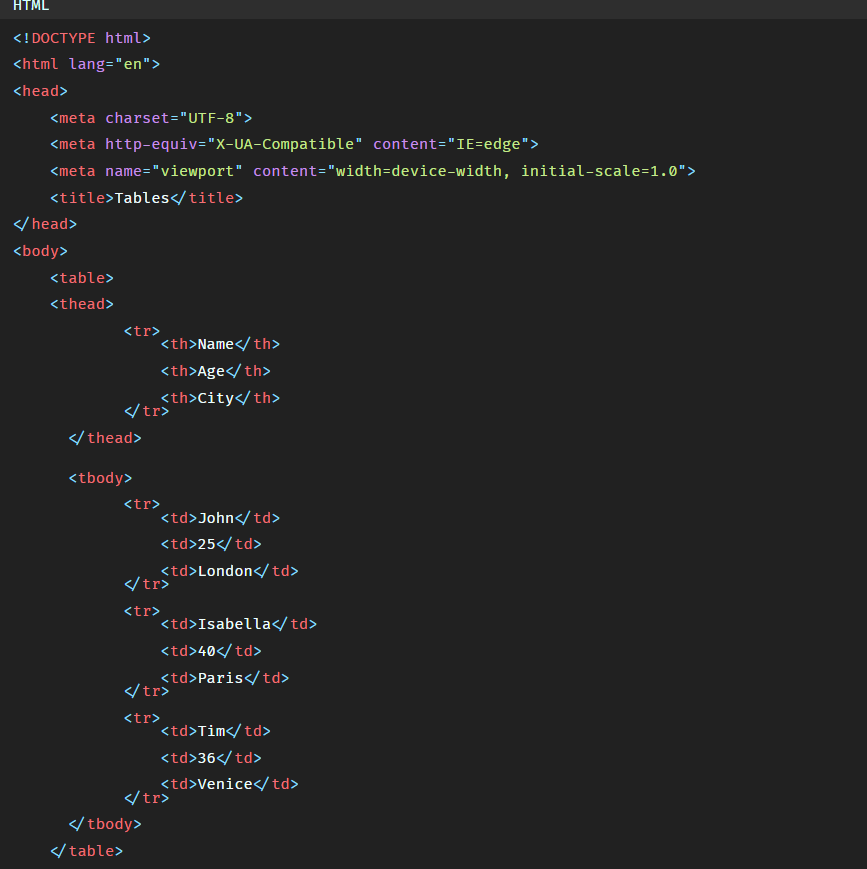
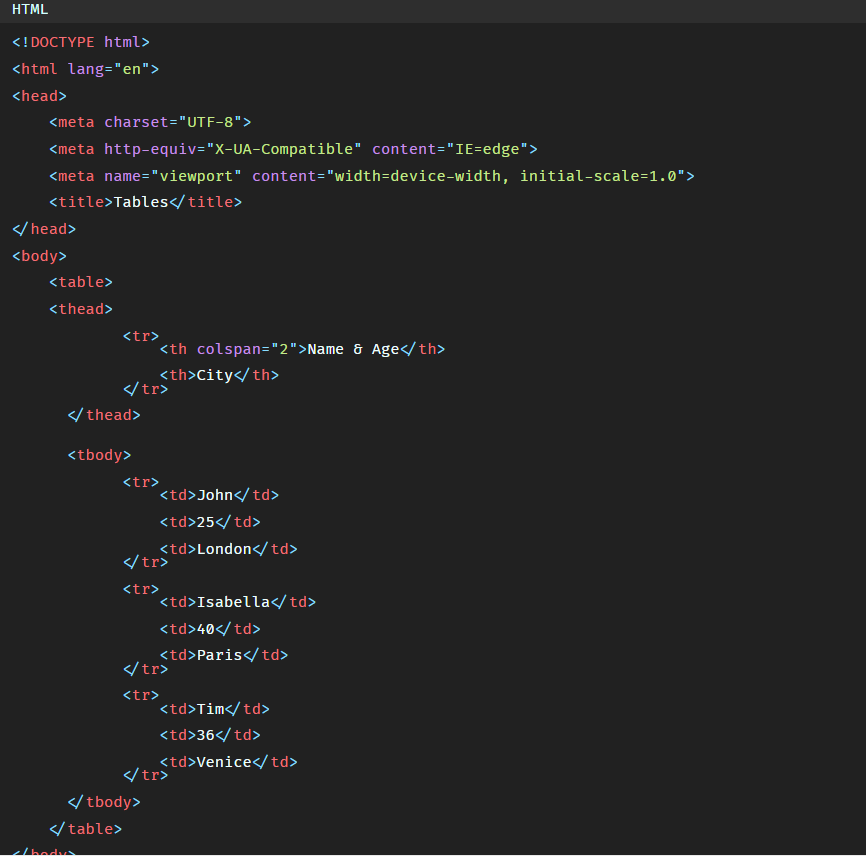
And same thing as for the <tbody></tbody> tag, to specify to the browser that this part of the table is the table headers we will add the <thead></thead> tag.
So the HTML code is:
 Again, if you refresh the browser you will not see any changes, that is because these tags don't affect how the table will be displayed. They are added just for information and to make the code clear.
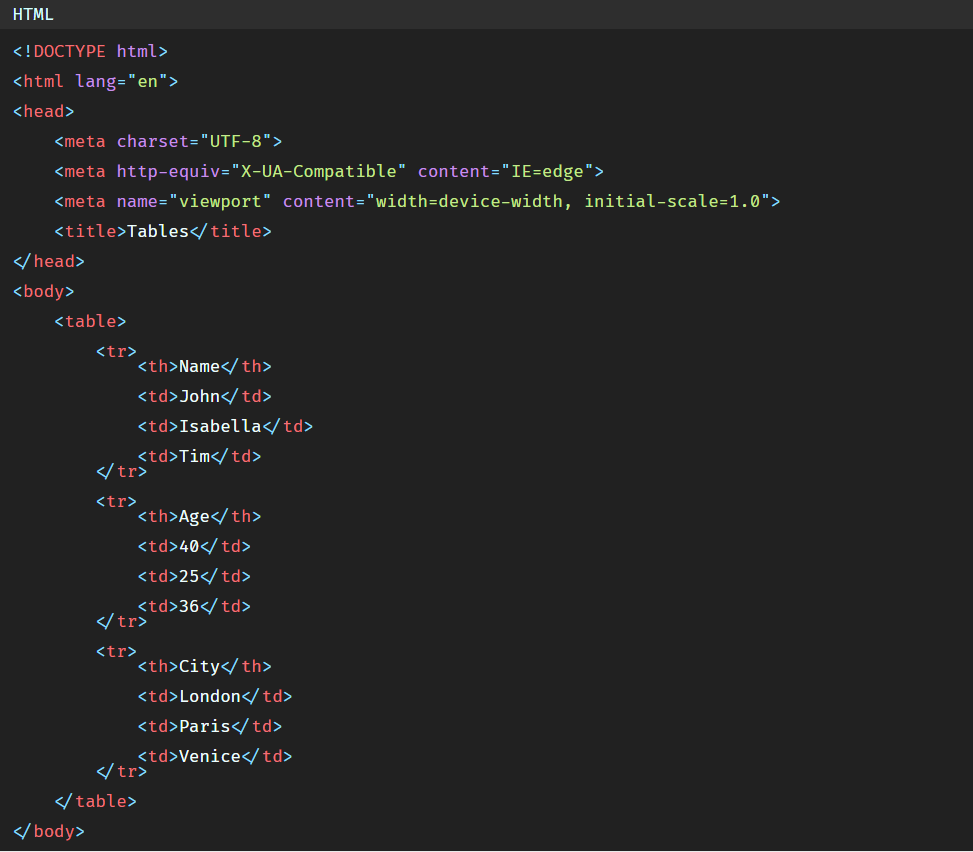
We can also add vertical headers instead of horizontal headers. Let's remove the <thead></thead> and <tbody></tbody> tags and create vertical headers.
The HTML code will be:
 The table will now look like this:

b)- Merging table cells and rows
1)-colspan property
Let's go back to the table that has horizontal headers.
So our table has 3 columns, which means we should have 3 headers.
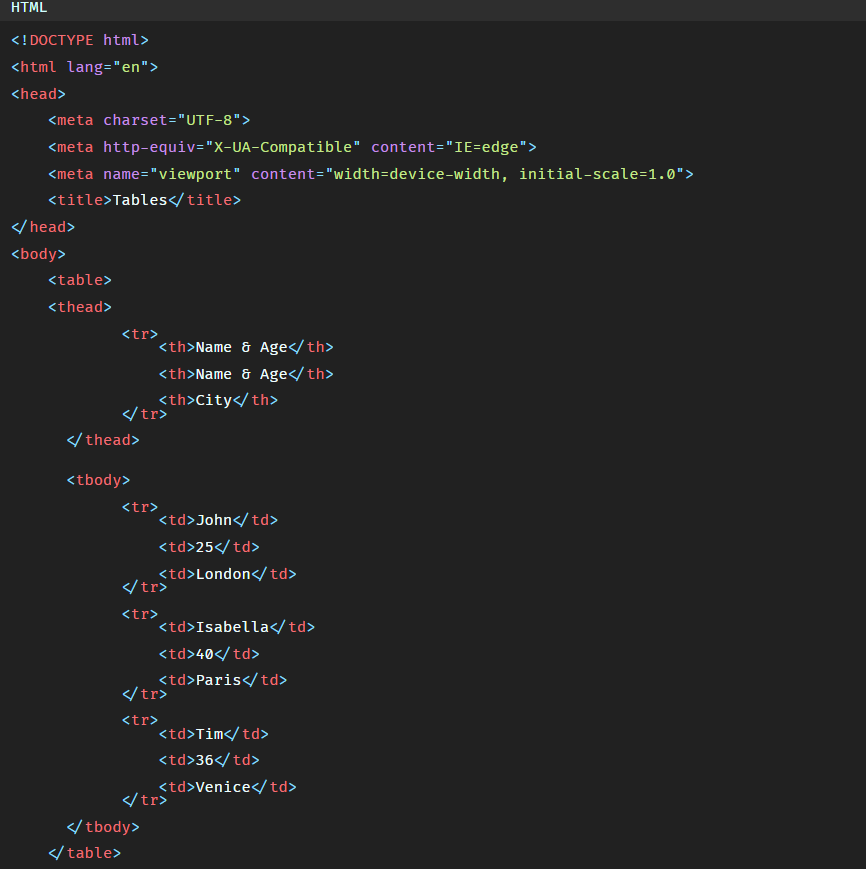
Let's say this time we want to add only 2 headers: one header for the 2 first columns and one header for the third columns.
One way to do that is to add the same header name for the 2 first columns. So the HTML code will be:
 And so we'll have:
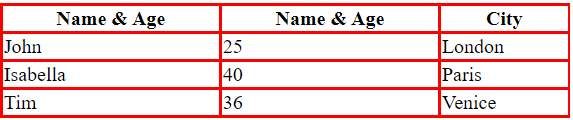 But this is redundant. The same header is repeated twice for both columns.
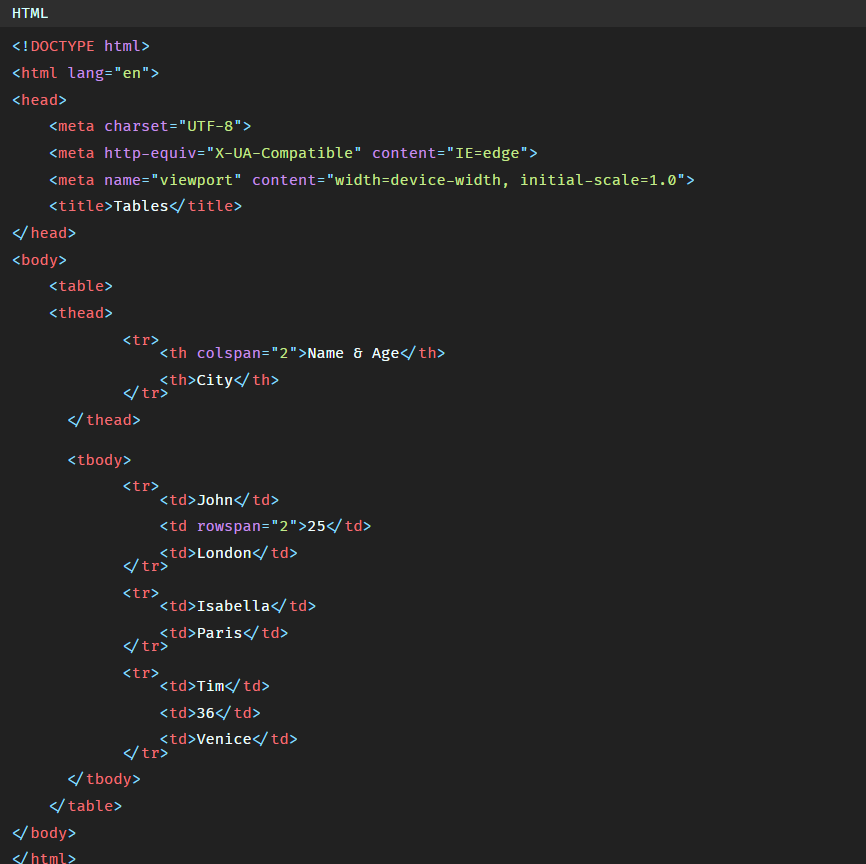
To do that properly we can merge both cells of the headers into one cell using the colspan property like this:
 So the table will be:
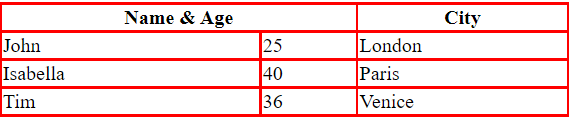 colspan allows us to merge table cells horizontally. If we want to merge 4 cells all we have to do is to give the colspan property a value of 4.
2)- rowspan
This time let's say that John and Isabella both have the same age that is 25 years old.
If we want to give them both the same age, one way to do it is to change the age in the <td></td> cell of Isabella like this:
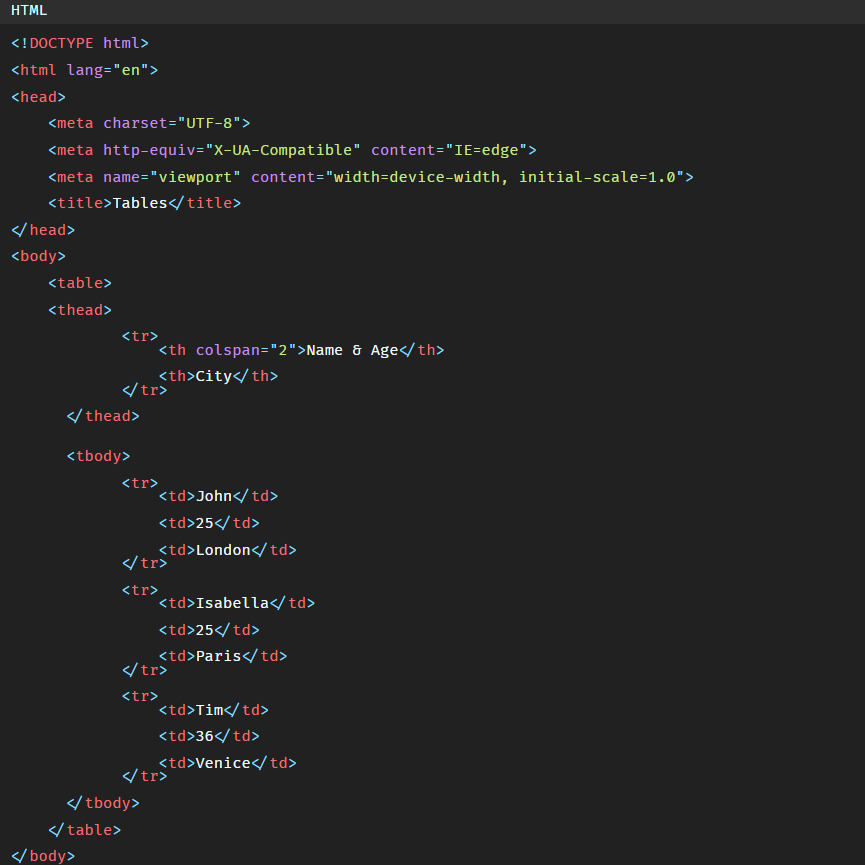 So in the browser we'll have:
 But we can do better. As both Isabella and John have the same age, we can merge the cells into one cell.
This time we will merge the cells vertically, so for that we'll use rowspan property.
We remove the <td></td> tag that contains Isabella's age and we add rowspan property inside the <td></td> tag of John to start the merge from John's cell.
 The table will look like this:

c)- <colgroup></colgroup> tag
To add some style to a specific number of columns we use the <colgroup></colgroup> tag.
Inside the <colgroup></colgroup> tag we add the <col> tag with the span attribute that will help us set the number of columns we want to be styled.
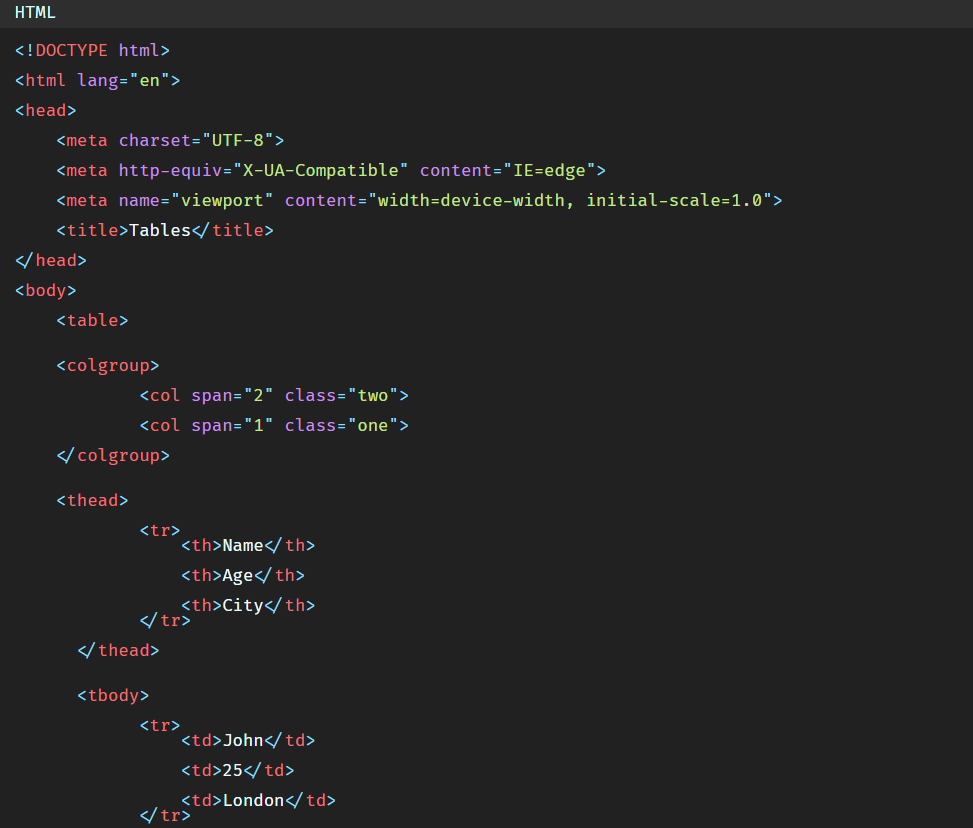
Let's say that we want to add light blue color to the 2 first columns.
So the code will be:
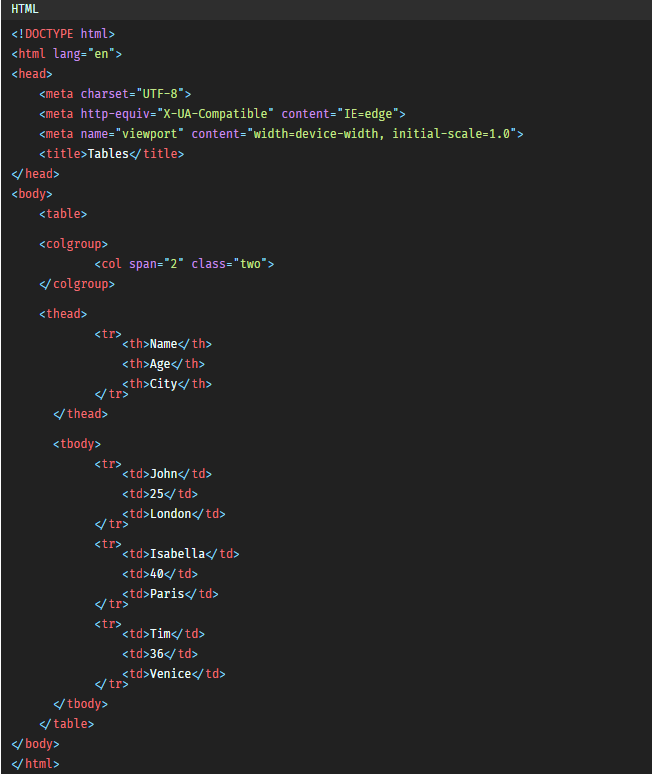 Here we selected the 2 first columns by giving the span attribute number 2. We added also a class attribute so that we can select our
 <col> tag in CSS.
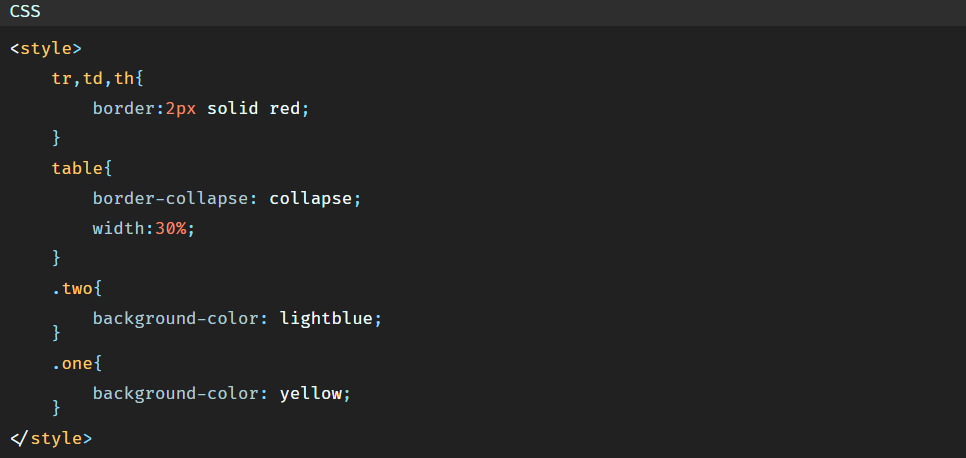
The CSS code will be:
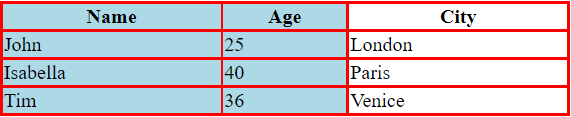
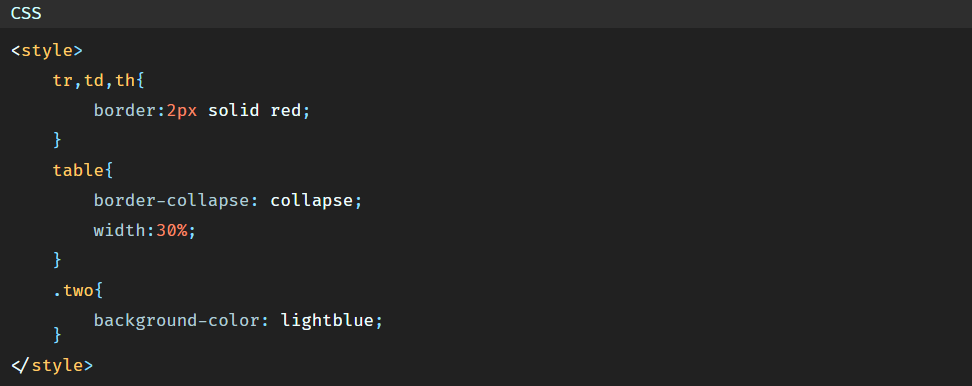 In the browser we have:
 Now if we want to add a different color to the 3rd column all we have to do is to add another line of code where we specify to the span attribute that we want the 3rd column to be in yellow:
 and the CSS will be:
 So in the browser we have:
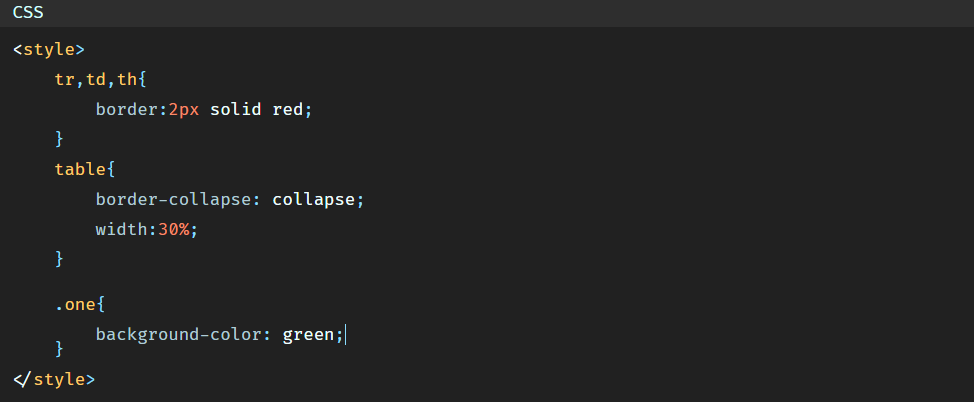
 If we want to style columns in the middle of the table only, let's say the second column for example, we add the
 <col> tag with the span attribute first that we don't select in CSS, because we don't want the first column to be styled, and then we add a second line of code of <col> tag and span attribute that we will select in CSS.
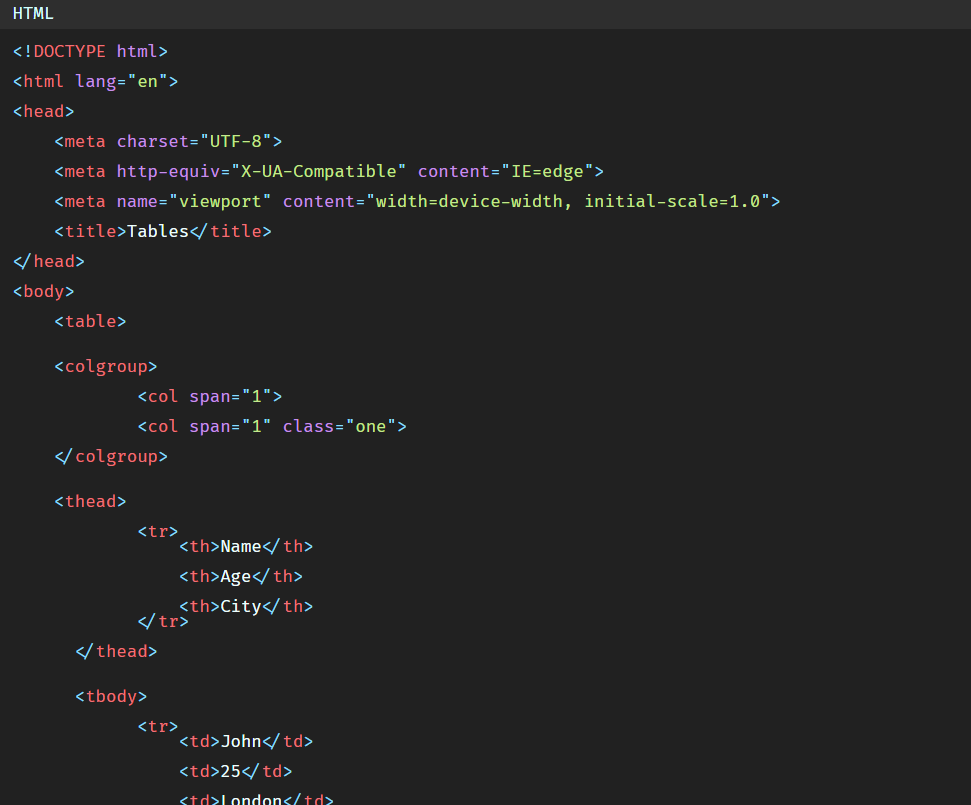 The CSS code will be:
 At the end we have:

d)- Table caption
To add a title or a caption to the table we will use the <caption></caption> tag.
By default the caption of the table is always placed above the table.
To add the caption we'll add the following code:
 In the browser we have:
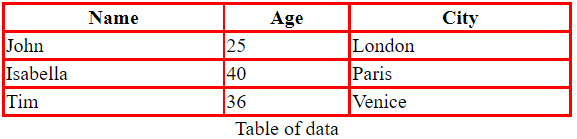
 If we want the caption to be at the bottom of the table all we have to do is to add CSS property
caption-side and set its value to bottom.
If we want the caption to be at the bottom of the table all we have to do is to add CSS property
caption-side and set its value to bottom.
 So the caption will look like:
Conclusion
In this tutorial we've seen HTML tables, various ways to implement them and also understood how to use them through many examples.
Tables are always used in communication, research, and data analysis, that's why mastering them is very important in today's world as they come handy in presenting data.


