How to build a dropdown list in HTML?

1)- What is a dropdown list?
A dropdown list is a list of choices made for the users to offer them the possibility to choose among many choices.
A dropdown list is a <form></form>element and it looks like this:
 In the below steps, we’ll see how we can create a dropdown list like the one above.
2)- How to create a dropdown list?
To create a dropdown list you’re going to need to put it either in a <form></form> tag or you can use it as a standalone element, depending on how you want to use it.
In this tutorial let’s add it inside a <form></form> tag. For more information on the
<form></form> tag and how to make a form in HTML check my tutorial:
Build a Form with HTML.
So to cerate a dropdown list we will use the <select></select> tag, and inside this
<select></select> tag we’ll add <option></option> tag.
This <option></option> tag is what will contain the choices offered to the user. One
<option></option> tag represents one choice.
Let’s say we want to offer the user a programming language selection to choose from, so the code goes like this:
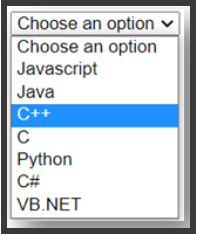
 In the browser we’ll have:
 A good practice is to add value attribute to the
 <option></option> tags. That is because when the selected value will be sent to the server, the server will not understand which option was selected, and so we add the value attribute to make easier for the server to know which option was selected by the user.
We’ll add a name attribute to the <select></select> tag for the same reason, for the server to know which dropdown list are we talking about.
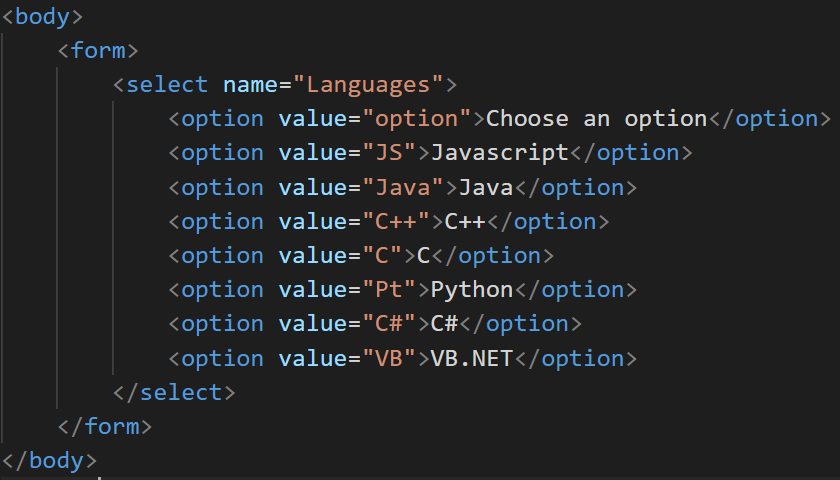
So the code is:
 Now let’s say that we have 2 groups of choices, each group contains a number of options to choose from. How can we divide the dropdown list into 2 separate groups?
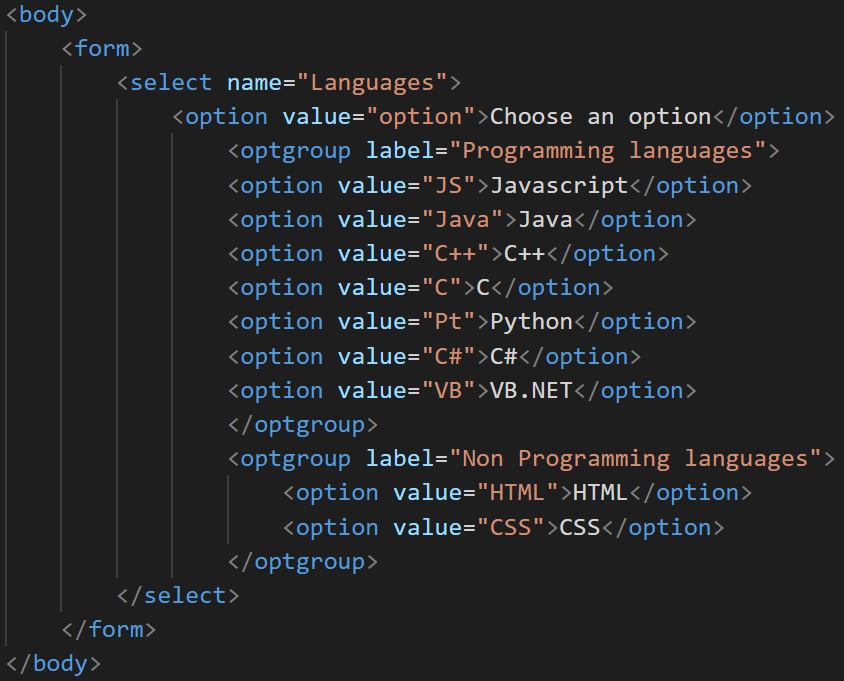
To do that we’ll use the <optgroup></optgroup> tag with the label attribute to add a name to the group like this:
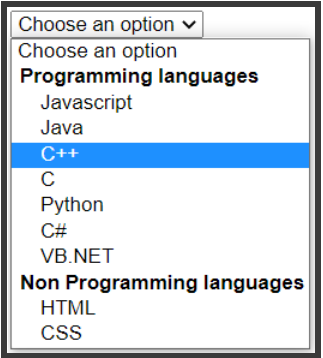
 So in the browser that looks like this:
 Now let’s see what other attributes we can use with the dropdown list.
a)- multiple attribute
The attribute multiple allows the user to select multiple choices from the dropdown list. We’ll add it in the <select></select> tag, and so the code will be:
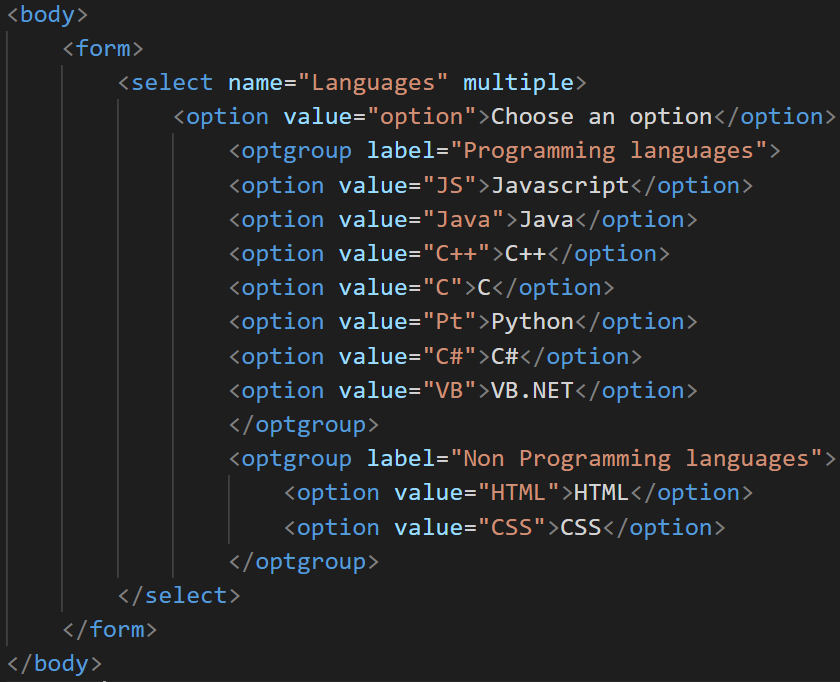 The dropdown list becomes then:
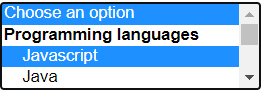 So now the user can select multiple choices at the same time. But now we have only 4 items visible, if we want to see more items we have to scroll down. This can be a bad user experience to show the dropdown list with only 4 items, especially if the dropdown list contains many items to choose from, the user will have to scroll over and over to get to the option they want to select.
So how can we solve this problem?
b)- size attribute
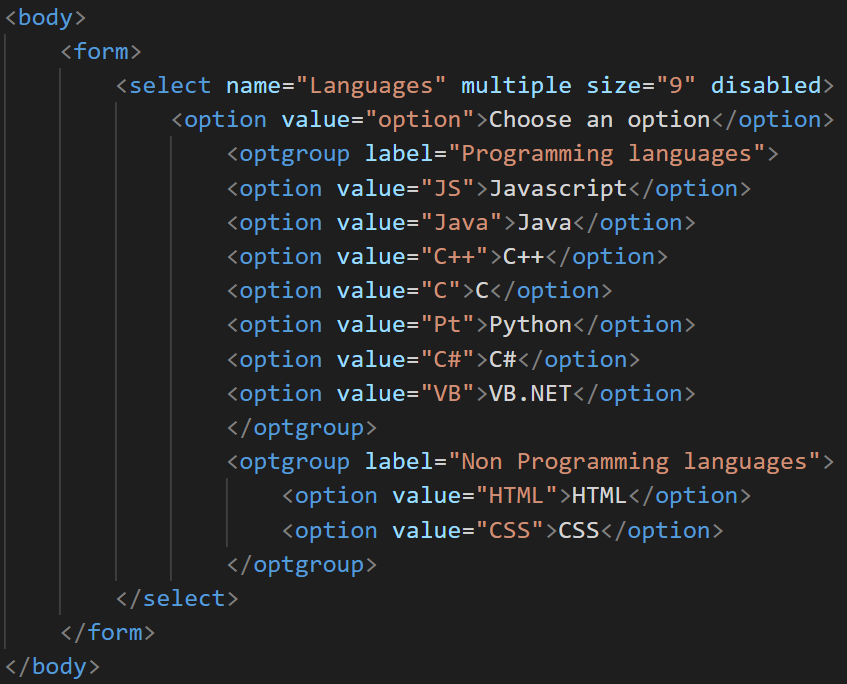
To make more options visible to the user we will add the size attribute. Let’s say that we want 9 options to be visible, so we’ll add the attribute in the <select></select> tag like this:
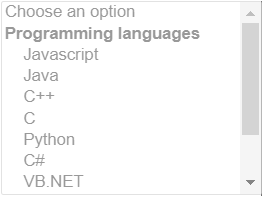
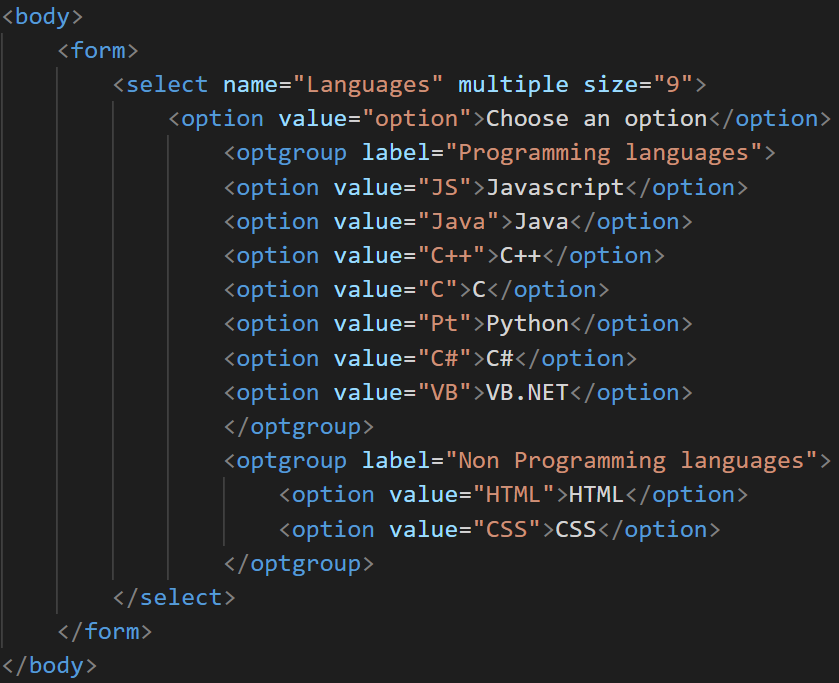 In the browser we’ll have:
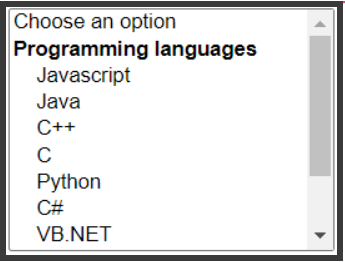 Now we have 9 options visible, which comes handy to the user.
c)- disabled attribute
If for any reason or another you want to disable the dropdown list there is an attribute for that and that is the disabled attribute.
The attribute is added inside the <select></select> tag:
 So dropdown list becomes :
3)- Conclusion
Dropdown lists are very important elements in the webdesign, they offer multiple choices to the user to select from.
They can be used with attributes to be tailored to the user’s need.


